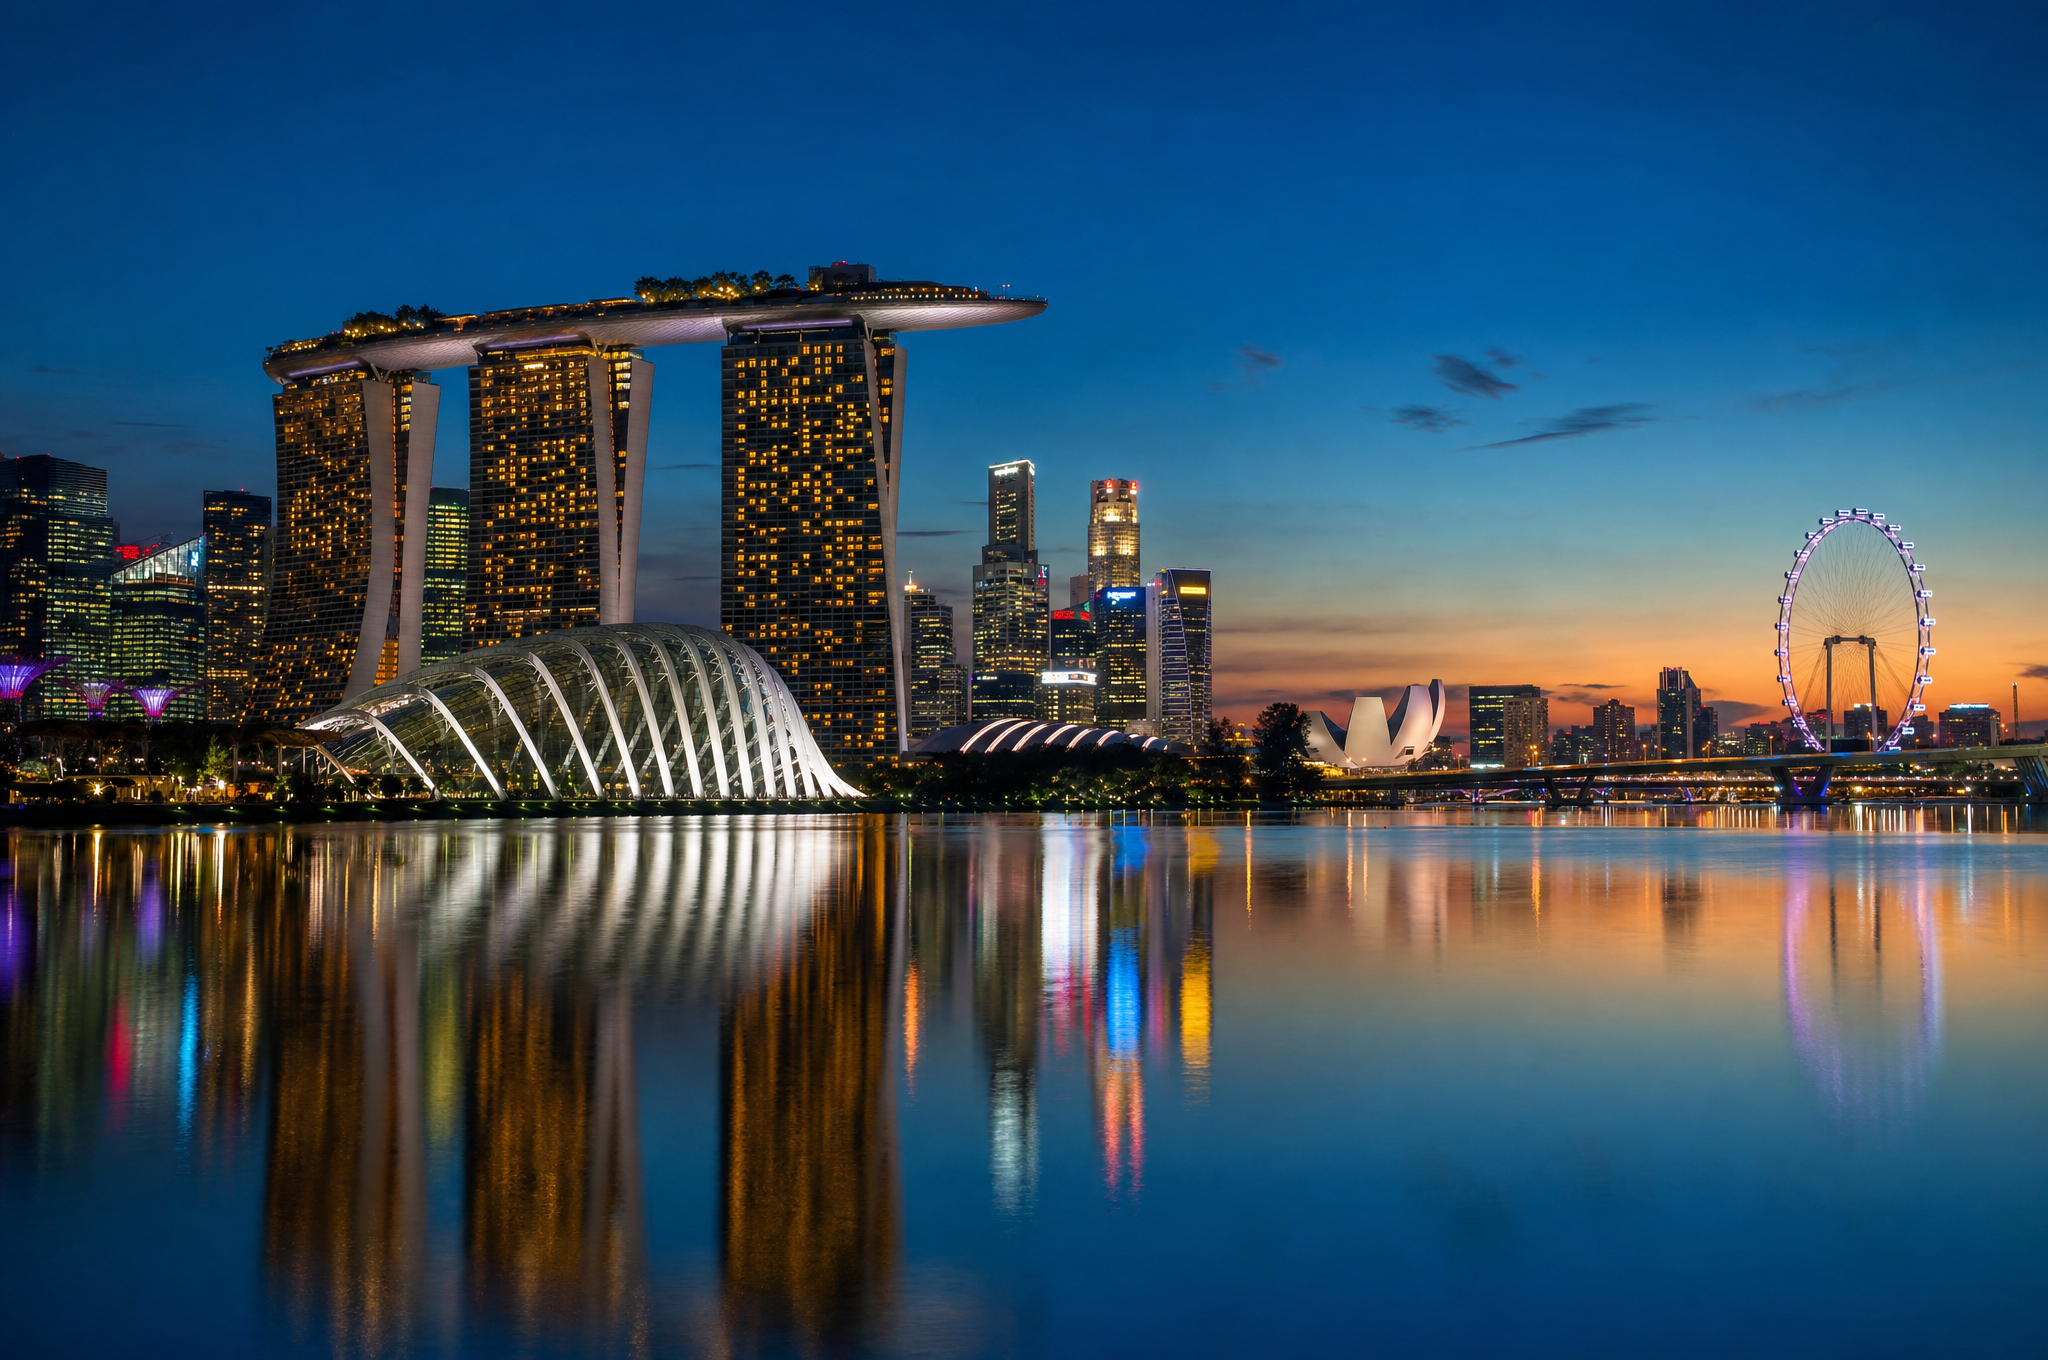
The blue hour over Marina Bay lasts roughly twenty minutes. In that window, the sky deepens from gold to indigo, the city's lights reach full intensity, and the harbor water turns into a mirror. Getting it right is a matter of timing, position, and preparation — not luck.
I've shot Marina Bay at blue hour more times than I can count, across different seasons and weather conditions. What follows is a practical guide based on repeated visits: when to arrive, where to stand, and what settings consistently produce balanced exposures without HDR blending.
Understanding Singapore's Blue Hour
Singapore sits roughly one degree north of the equator, which means sunset times vary only about 20 minutes across the entire year. The sun sets between approximately 6:50 PM (shortest days) and 7:15 PM (longest days). Blue hour — the period when the sun is between 4 and 8 degrees below the horizon — begins about 15 minutes after sunset and lasts roughly 20 minutes.
This is dramatically shorter than blue hour at higher latitudes. In London or Tokyo, you might get 40–50 minutes of usable blue light. In Singapore, you get 20. That means you must arrive early, set up before sunset, and be ready to shoot continuously once the window opens.
The biggest mistake photographers make at Marina Bay is arriving at sunset. By the time you find your spot, level your tripod, and dial in settings, the blue hour is half over. Arrive 45 minutes early.
The Four Best Vantage Points
1. The Helix Bridge (South Side)
Standing on the Helix Bridge looking toward Marina Bay Sands gives you the iconic three-tower composition with the ArtScience Museum in the foreground. The bridge's own structure creates natural leading lines. The downside: the bridge vibrates slightly from foot traffic, so you'll need to shoot between waves of pedestrians. Use a 2-second shutter delay.
2. Merlion Park
Directly across the bay from Marina Bay Sands, Merlion Park offers the widest unobstructed view. You get the full skyline — MBS, the CBD towers, and the Esplanade — in one frame. The water between you and the skyline produces clean reflections on calm evenings. This is the most popular spot, so arrive early to claim tripod space along the railing.
3. The Promontory
The eastern tip of Marina Bay, the Promontory offers a less conventional angle. You're shooting back toward the CBD with MBS on your left. This position works particularly well if there are scattered clouds — the sky behind the towers catches the last warm light while the blue tones dominate the water and foreground.
4. Jubilee Bridge
A smaller pedestrian bridge next to the Esplanade Bridge, Jubilee Bridge puts you at water level with a clear sightline to MBS. It's less crowded than Merlion Park and the Helix Bridge, and the low angle emphasizes the reflection in the foreground water.
Camera Settings That Work
Blue hour photography is essentially long-exposure work. The goal is to balance the ambient sky light with the artificial city lights. Here are the settings I use as a starting point:
- Aperture: f/8 to f/11. You need depth of field for the skyline to be sharp edge to edge, but don't go beyond f/11 — diffraction softens the image and the city lights produce star bursts that can become distracting at smaller apertures.
- ISO: 100 or 200. Keep it low. You're on a tripod; there's no reason to raise ISO.
- Shutter speed: 10 to 30 seconds. This is where blue hour gets interesting. At 15–30 seconds, the water smooths to glass, reflections sharpen, and any moving boats or people disappear from the frame.
- White balance: Manual, around 4500K–5500K. Auto white balance will fight you as the light changes. Pick a Kelvin temperature and stick with it — you can fine-tune in post.
- Focus: Manual, set to infinity (or just short of it) before the light drops. Autofocus will hunt in low light.
Field Tip: The Histogram Is Your Guide
Don't trust your camera's LCD in the dark — it lies. The screen will make underexposed images look brighter than they are. Check your histogram after every shot. You want the data clustered in the middle-right third, with no clipping on either end. As the sky darkens, you'll need to extend shutter speed or widen aperture to maintain exposure.
The Twenty-Minute Sequence
Here's how a typical blue hour shoot unfolds at Marina Bay, assuming a 7:10 PM sunset:
6:25 PM — Arrival: Arrive at your chosen vantage point. Set up the tripod, compose the shot, and focus manually. Take a test exposure at daylight settings to confirm sharpness and composition.
6:50 PM — Sunset: The sky goes warm. Shoot a few frames — the golden hour shot is a different image, but it's worth capturing. The city lights are starting to come on but are not yet at full intensity.
7:05 PM — Transition: The warm tones are receding. The sky is transitioning through magenta and purple. Start extending your shutter speed. This is the transitional period — not quite golden, not quite blue. Some photographers skip this, but the magenta minute can produce unique images.
7:20 PM — Blue Hour Begins: The sky has deepened to a rich blue. The city lights are at full intensity. This is the moment. Shoot continuously. Adjust shutter speed every 3–4 minutes as the sky continues to darken. Your exposures will go from 10 seconds to 20 seconds to 30 seconds over the next twenty minutes.
7:40 PM — Blue Hour Ends: The sky is now too dark to record as blue — it will render as black. The balance between sky and city lights is gone. Pack up, or switch to pure night photography techniques (light painting, star trails — though light pollution makes the latter impractical in Marina Bay).
Weather Considerations
Singapore's weather is a factor year-round. The Northeast Monsoon (December to March) brings more cloud cover and rain, but also more dramatic skies. Clear evenings produce cleaner reflections but flatter skies. Partially cloudy conditions are often the best — clouds catch the last light and add texture to the sky, while breaks allow the blue to come through.
Check the wind. Marina Bay is sheltered, but strong wind ripples the water and kills reflections. Calm evenings produce the mirror-like water that makes Marina Bay blue hour shots iconic.
Finally, humidity. Lens fogging is a real problem when moving from air-conditioned spaces (MRT, malls) to the warm humid outdoors. Let your camera acclimate for 15 minutes before shooting. Keep a microfiber cloth handy.
Post-Processing Notes
Blue hour images typically need minimal processing if you've exposed correctly. The main adjustments:
- Lift shadows slightly to reveal detail in the darker building facades.
- Reduce highlights on the brightest light sources (MBS skypark lights, Esplanade lights).
- Increase clarity and texture moderately — the long exposure smooths water but you don't want the buildings to look soft.
- Slightly increase vibrance, not saturation. Blue hour colors are already rich; saturation pushes them into unrealistic territory.
Avoid the temptation to over-saturate the blue. The sky should look like the sky looked — a deep, natural blue. If it looks neon, you've gone too far.
Final Thoughts
Marina Bay at blue hour is one of the most photographed scenes in Asia, and for good reason. The combination of world-class architecture, reflective water, and a brief, intense color window makes it a genuinely rewarding location for architectural photography. The key is preparation: know the sunset time, arrive early, have your settings dialed in, and shoot continuously through the twenty-minute window.
For a different perspective on the same area, try a dawn walk along the Singapore River — the same district at the opposite end of the day, with completely different light and atmosphere.